An Introduction to MobileConnect in Salesforce Marketing Cloud
What is MobileConnect?
MobileConnect is a feature included in Salesforce Marketing Cloud that enables users to create, send, receive and track SMS and MMS messages aimed at contacts.
These are some of the features included in MobileConnect:
- Templates for creating SMS and MMS messages.
- Include personalization by pulling attributes’ values from a data source.
- Set up the type of send: manual or automatic. MobileConnect is compatible with Automation Studio, which enables any user to create scheduled message sends.
- MobileConnect is also compatible with Journey Builder. This translates into the possibility to create more complex send flows. It can even integrate both Email and SMS/MMS sends within the same flow.
- Contact management: not only can users manage their contacts, but can also create standard lists, filtered lists.
- Integration between Email Studio and MobileConnect: MobileConnect can make use of Data Extensions to import subscriber data.
Getting started with MobileConnect
There are three key elements to consider when working with MobileConnect:
- Contacts
- Messages
- Setting up the Send
Let’s review them:
Contacts
Making contacts available in MobileConnect can be accomplished by making use of three different methods:
- Can be manually created
- Can be imported by using source files
- Can be imported by creating import definitions.
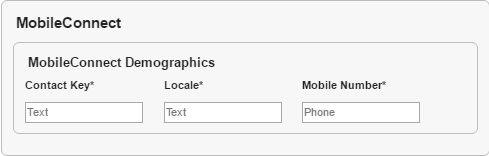
A user must take those methods into account when making contacts available in MobileConnect and regardless of which method is chosen, there are three mandatory attributes for which values will have to be provided: Contact Key (unique identifier for each subscriber), Locale (this is the code for the country’s location) and Mobile Number (the actual destination for the messages).
- Manual creation: Manually input values for the three mandatory attributes.
As seen in the screenshot below, all three are tagged with an asterisk.
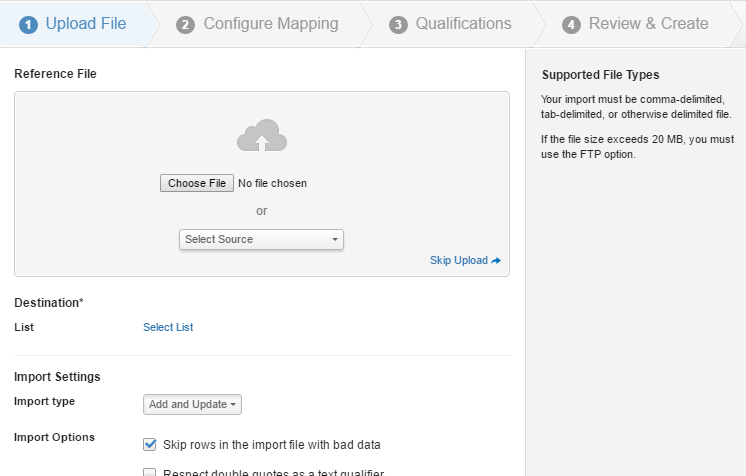
- Import file: Once this option is selected, the first screen will prompt the user to select the destination for the subscribers. Destination can be the all contacts list, an available standard list (one that has been previously created) or a new standard list.
Next, the actual import wizard is presented on screen. Step 1 includes selecting the source file for the subscribers (note that files must be .CSV and weigh up to 20 MB). Step 2 requests for a code and a keyword to be selected (the code is an internal resource for performing the actual message sends but does not need to be entered by the user since it comes as a default; keywords on the other hand need to be manually entered and are used for bidirectional communications). Then there is Step 3, which requires the user to set up the attribute mapping between source and target, and finally Step 4 displays a summary on screen and enables the user to trigger the import process.
- Import definitions: Import definitions go a step further in terms of how subscribers can be imported. They offer the possibility to select either a file location (to retrieve .CSV files that are greater than 20 MB and that have been uploaded to external FTP sites) or a source Data Extension (which is also a fantastic way of re-utilizing subscribers available in Email Studio and using them in Mobile Connect).
There is an import wizard that resembles that of Email Studio: for the first step, the user must select the source, the destination list, the type of import (note that there is no overwrite option available) and further import options. The second step consists in setting up the mapping between source and target. Qualifications for the import are presented in the third step, and a summary in the fourth.
Messages
The “create message” wizard includes four steps, each of which is reviewed next:
- Step 1 “Select template”: depending on the type of communication, there are pre-loaded templates that the user can choose from. While design may not be too flexible, there is still the possibility of adding personalization to the messages.
- Step 2 “Define content”: this is where the main message configuration takes place. User to enter a name, the code, the send method, the actual Outbound message (which, once selected, will display a mobile phone on screen that works as a preview of what the actual SMS/MMS message will look like) and further option settings.
As for the send method, depending on how the message is intended to be used (API calls, automations in Automation Studio, journey in Journey Builder) there is a specific send method that has to be selected.

- Step 3 “Select audience”: will have to select the audience at which the message is aimed.
- Step 4 “Schedule/Activate”: the send can be tagged as active, and it can also be scheduled to run at a specific time and day.
Sends
As already described, there are four ways in which a message send can be performed:
![]()
- Schedule: the schedule takes place within Mobile Connect, and any active and scheduled message will be presented on screen, on the “Overview” page.
- API trigger: sends are performed through API calls.
- Automation: there is a “Send SMS” activity within Automation Studio that makes use of compatible messages.
- Interactions: these are the messages to be inserted into journey’s flows within Journey Builder.
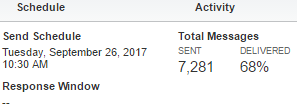
Tracking sends
Keeping track of the sends can be performed through the “Overview” page. Here the user will be able to find each send, along with stats on total number of messages sends, and their deliverability.
Conclusion
MobileConnect is a feature that, while not as standardized as Email Studio, it is still capable of offering a working environment that is rich enough to allow reaching contacts through mobile texting become a reality.