Organizing and Managing Assets in Content Builder
Salesforce Marketing Cloud has developed an advanced tool for programming and designing marketing content, known as Content Builder. This feature has a flexible search and makes it easy to facilitate the organization, labeling, and administration of content pieces by allowing you to set your own organizational folder structure that contains all the documents, templates, images, and emails, classifying them in local and shared folders.
In this article, we will see how to properly organize all the content for the creation of emails and the best practices to keep all our files organized within Content Builder.
Navigation
Before starting with the tips, it is necessary to know there are two ways to enter Content Builder:
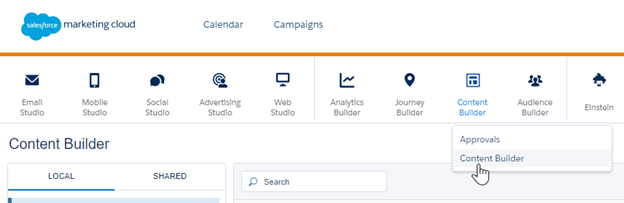
1. Going directly to Content Builder, from the Marketing Cloud menu bar:
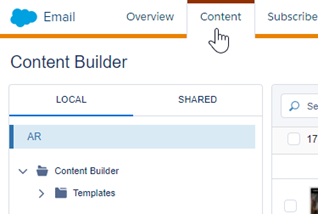
2. Entering from Email Studio ⇒ Email and selecting the Content option from the Email Studio Navigable Menu:
Once inside Content Builder, let’s see the characteristics this Marketing Cloud function has for content management.
Tips for organizing your content in Marketing Cloud
1. Folder Structure
One of the best methods of organizing files is their distribution in a folder structure similar to the one we work with on our computers every day. To do this method, Content Builder shows a column on the left side where all the content that has been uploaded or imported to Marketing Cloud will appear, within a general folder called Content Builder.
From this folder structure, it is possible to create, classify and organize files by dates, projects, business units, campaigns, file types, etc. Each folder has a drop-down submenu that, by right-clicking on it, makes it possible to create new folders, and rename, move or delete the selected folder.
In this way, we can make the content search much more intuitive and reduce the time in the creation of new emails.
2. Filters and Search Bar
When you have many projects and files, or a history of mailing, it means that finding specific files can become a complex task. For this method, Content Builder has two good tools to facilitate the search for these elements.
- Filters: We can filter the files according to the labels assigned to them when they were created, uploaded or imported. Additionally, it can be segmented according to the type of content or its owner. With this method, we will have specific control of the files if we need to reuse them in a new project.
- Search bar: When it comes to a much more specific search, there is nothing more effective than having a search bar, which can extract the file we need for our mailings from our folder scheme.
Remember: When uploading the files into Content Builder, do not use generic names (e.g., image1.jpg, header1.png, banner1.jpg) that can be repeated between different campaigns., When using the search bar, we could have multiple files with the same name.
3. Display Options and Quick Actions
Among the utilities that this Salesforce content manager presents, it is possible to distribute the files within the folders, facilitating the visualization of each element according to the desired criteria.
- Modified by: Organize all active elements by name, type and date it was added or the date of last modification.
- View Options: It offers the option of distributing the elements in a grid or detailed list, according to what the user prefers.
Additionally, you can select the elements that are displayed in the workspace and determine quick actions from the Actions button: move, delete, duplicate or share between business units, among others.
Conclusion
By following these recommendations, it will be much easier for you to organize and manage all your documents, images, templates, and emails in Salesforce Marketing Cloud Content Builder.
Do you need help with creating dynamic, personalized email messages using Salesforce Marketing Cloud? We can help! Contact Us