How To Get Salesforce Activation Codes on Slack
Two factor authentication (2FA) is the security standard for software that’s accessible in the Cloud, making it more difficult for cyber attackers to enter your environment and have direct access your data.
Salesforce 2FA options are pretty extensive, the standard being that upon login, a verification text is sent to your email account. You have to then access your email account and enter the verification code sent to you. You can read more about 2FA options in Salesforce here: https://trust.salesforce.com/en/security/2fa/
As many of you know, Salesforce licensing models are based on user accounts so in order to minimize the amount of users, some people choose to have a generic user using a generic email address that’s shared across teams.
When it comes to 2FA, here are a couple of reasons why having a generic notification email address, accessed by everyone, is not very optimal:
- Granting your entire team access to a generic email address will force you to change the generic email address’ password every time a member of your team leaves.
- Forwarding the email you receive to your entire team has a similar effect. Every time a new employee is welcome to your team or an existing member leaves you will have to update your forwarding rules.
Additionally, if you are an agency working with many clients in Salesforce you are probably in this situation, where you could ask the client to create a user account for each person in your team or you end up following some of these bad practices. Luckily, we have some alternatives to that.
Enter Slack
Slack is one of the most popular collaboration apps in the World, making it very easy for teams to centralize communications by using the concept of channels (almost like the chat rooms in the old days). Aside from the very user-friendly interface, Slack has a very robust API that allows you to develop your own slack commands and notifications.
As a professional services organization, we use slack to talk about projects, collaborate with other teams outside our company or organize fun activities after work.
A few years ago, I found myself conflicted between having to ask our customers for more user accounts or modifying forwarding rules constantly until I realized that we could solve this problem using Slack! Here’s how it works:

Fig 1. Salesforce to Slack Notifications
Implementing notifications on Slack
To get Salesforce activation codes on Slack, you don’t need to be a developer! We did all the heavy lifting for you, so you only need these 3 things:
- A Slack account with enough privileges to create apps
- A gmail account that will be granted only to certain people in your organization. Choose a generic name like: acmecompanysfnotifications@gmail.com
- A generic (as in not tied to an individual) Salesforce Marketing Cloud with the notification email address set to your generic email address or a generic Sales Cloud account where the email address field is set to your generic email address
Step 1. Create a Slack Channel
Creating a Slack channel will allow you to centralize all verification codes into one place. This will also make it easier to add or remove people from the channel if you make it private.
Choose a name that is relevant to the purpose of the channel, for example, I named mine “sfmc-notifications”.
Step 2. Create the Slack App
Access https://api.slack.com/apps and click on the “Create New App” button, enter your App name and choose the workspace where it will be used.
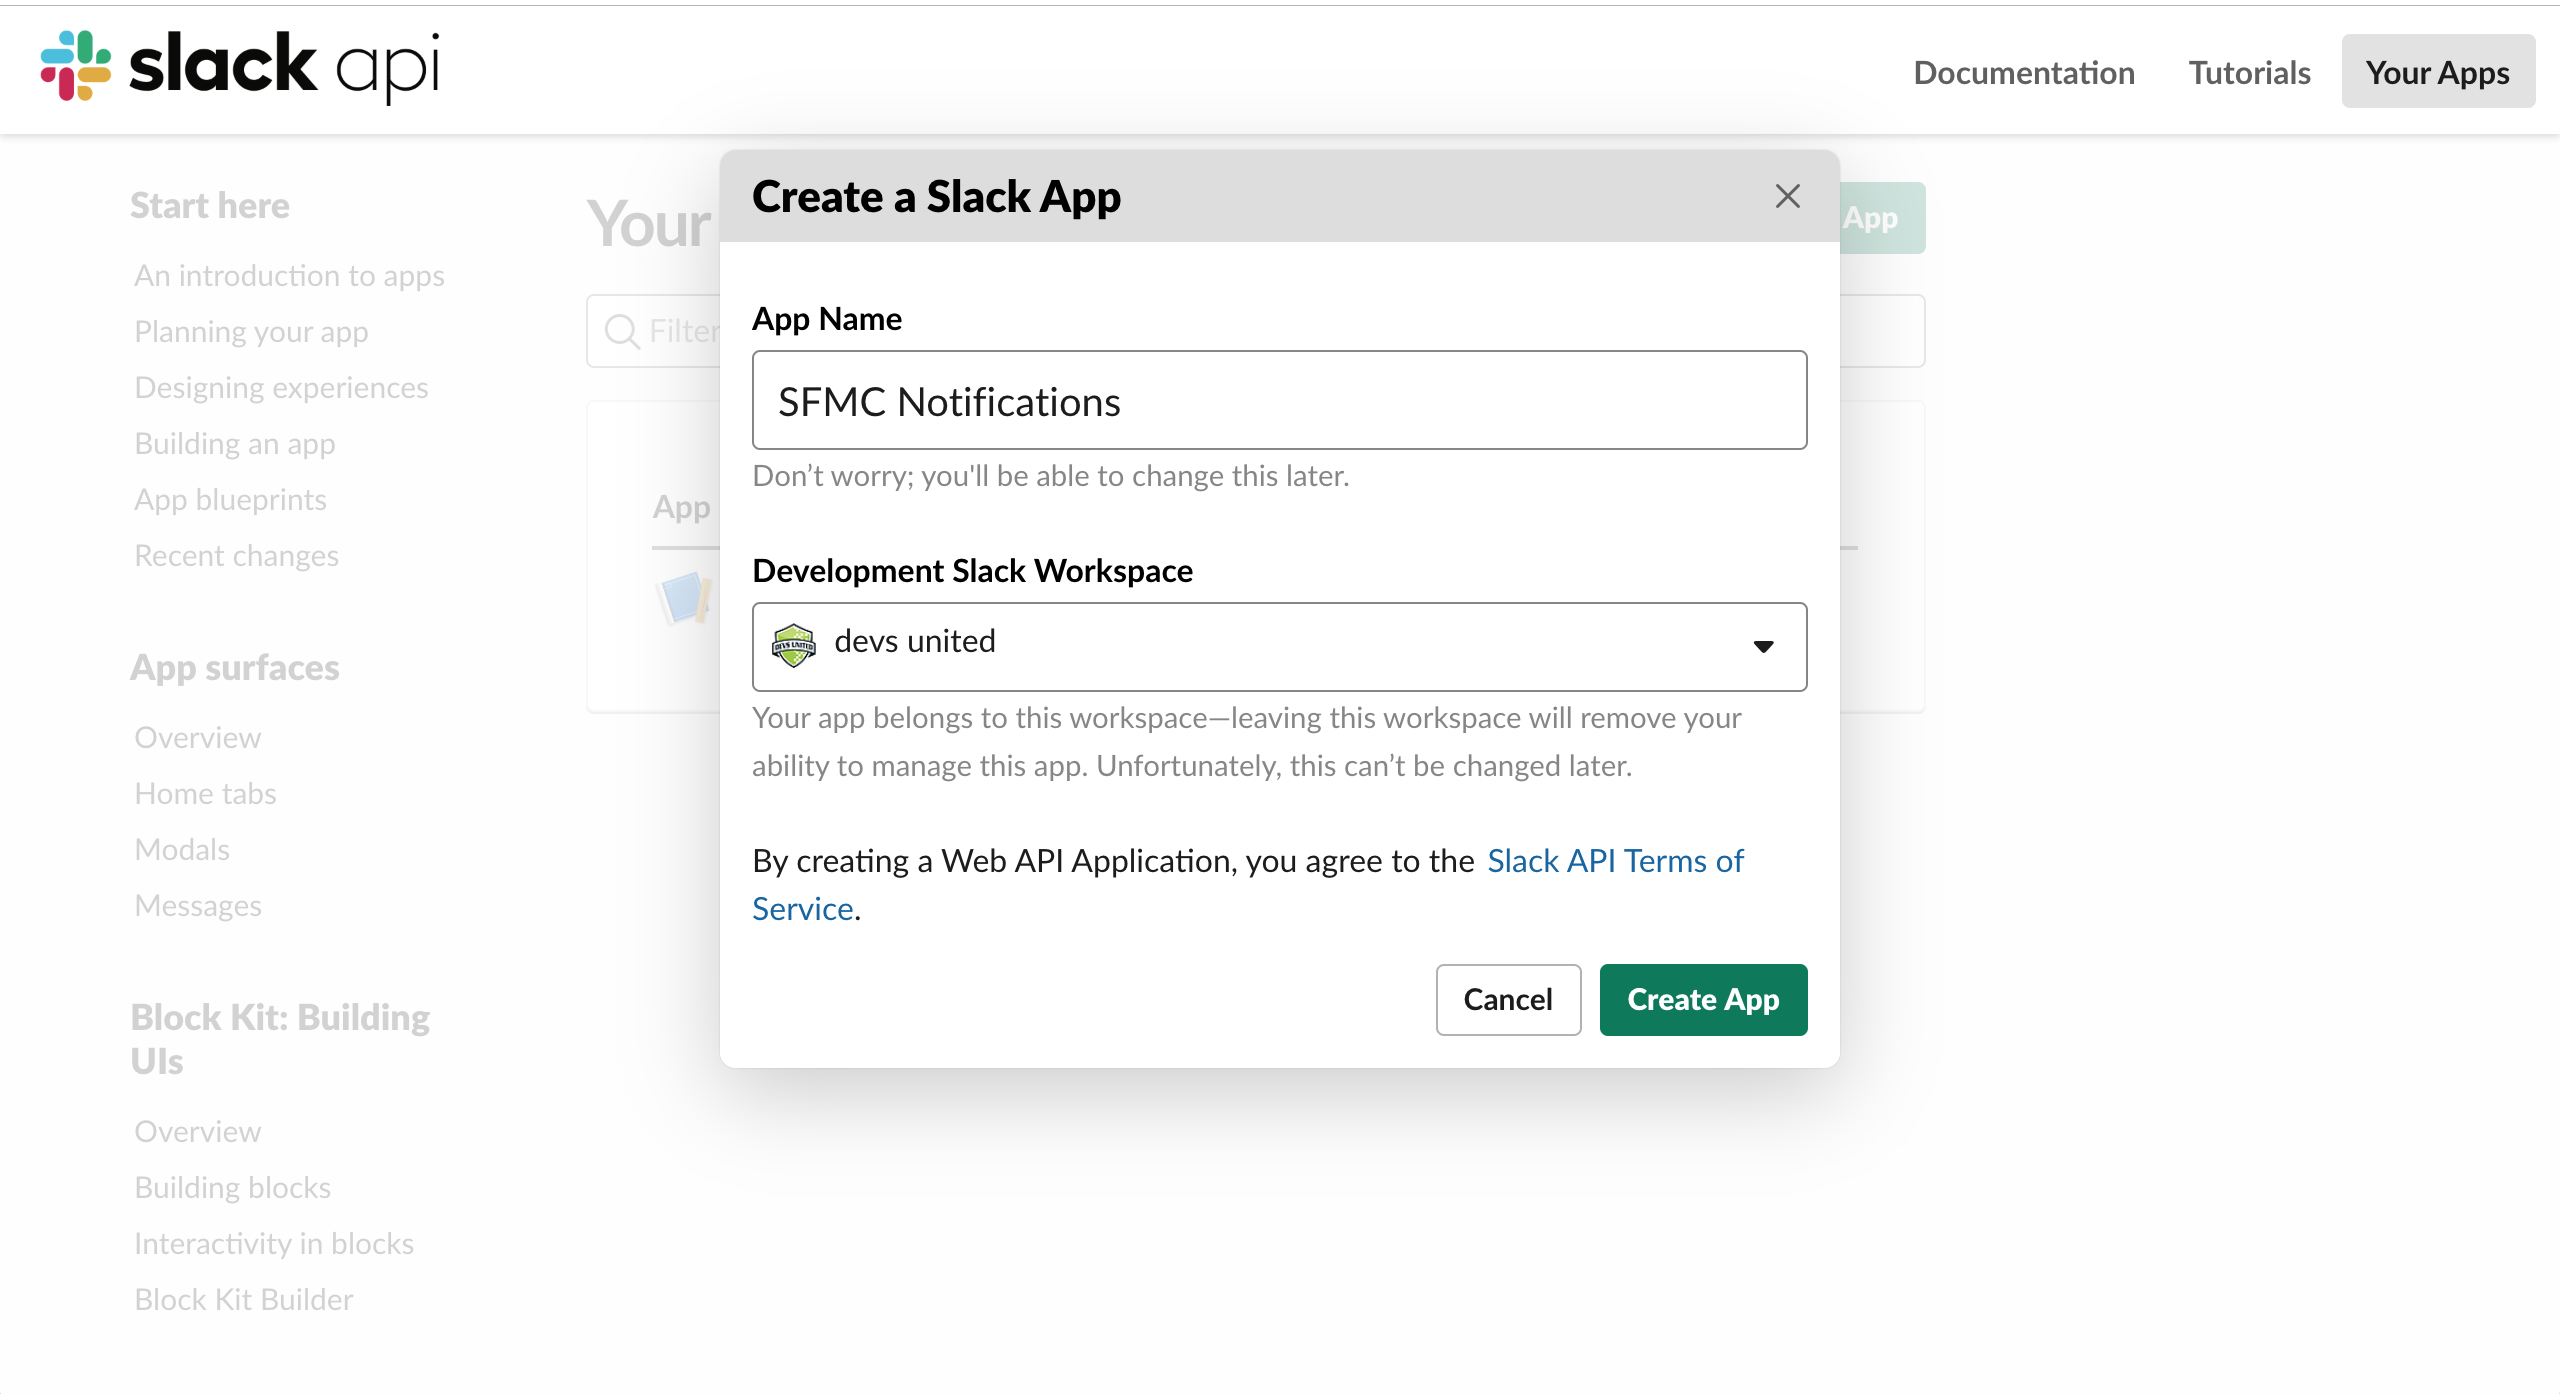
Fig 2. Creating a new Slack App
After the App is created, click in the “Incoming Webhooks” link on the left and choose to activate Incoming Webhooks by using the toggle on the right. Then, scroll down to the bottom and click on the “Add New Webhook to Workspace” button.
This will open a new window that will have you authorize the app to have access to your workspace. Here, you will also have to choose the channel we created earlier.
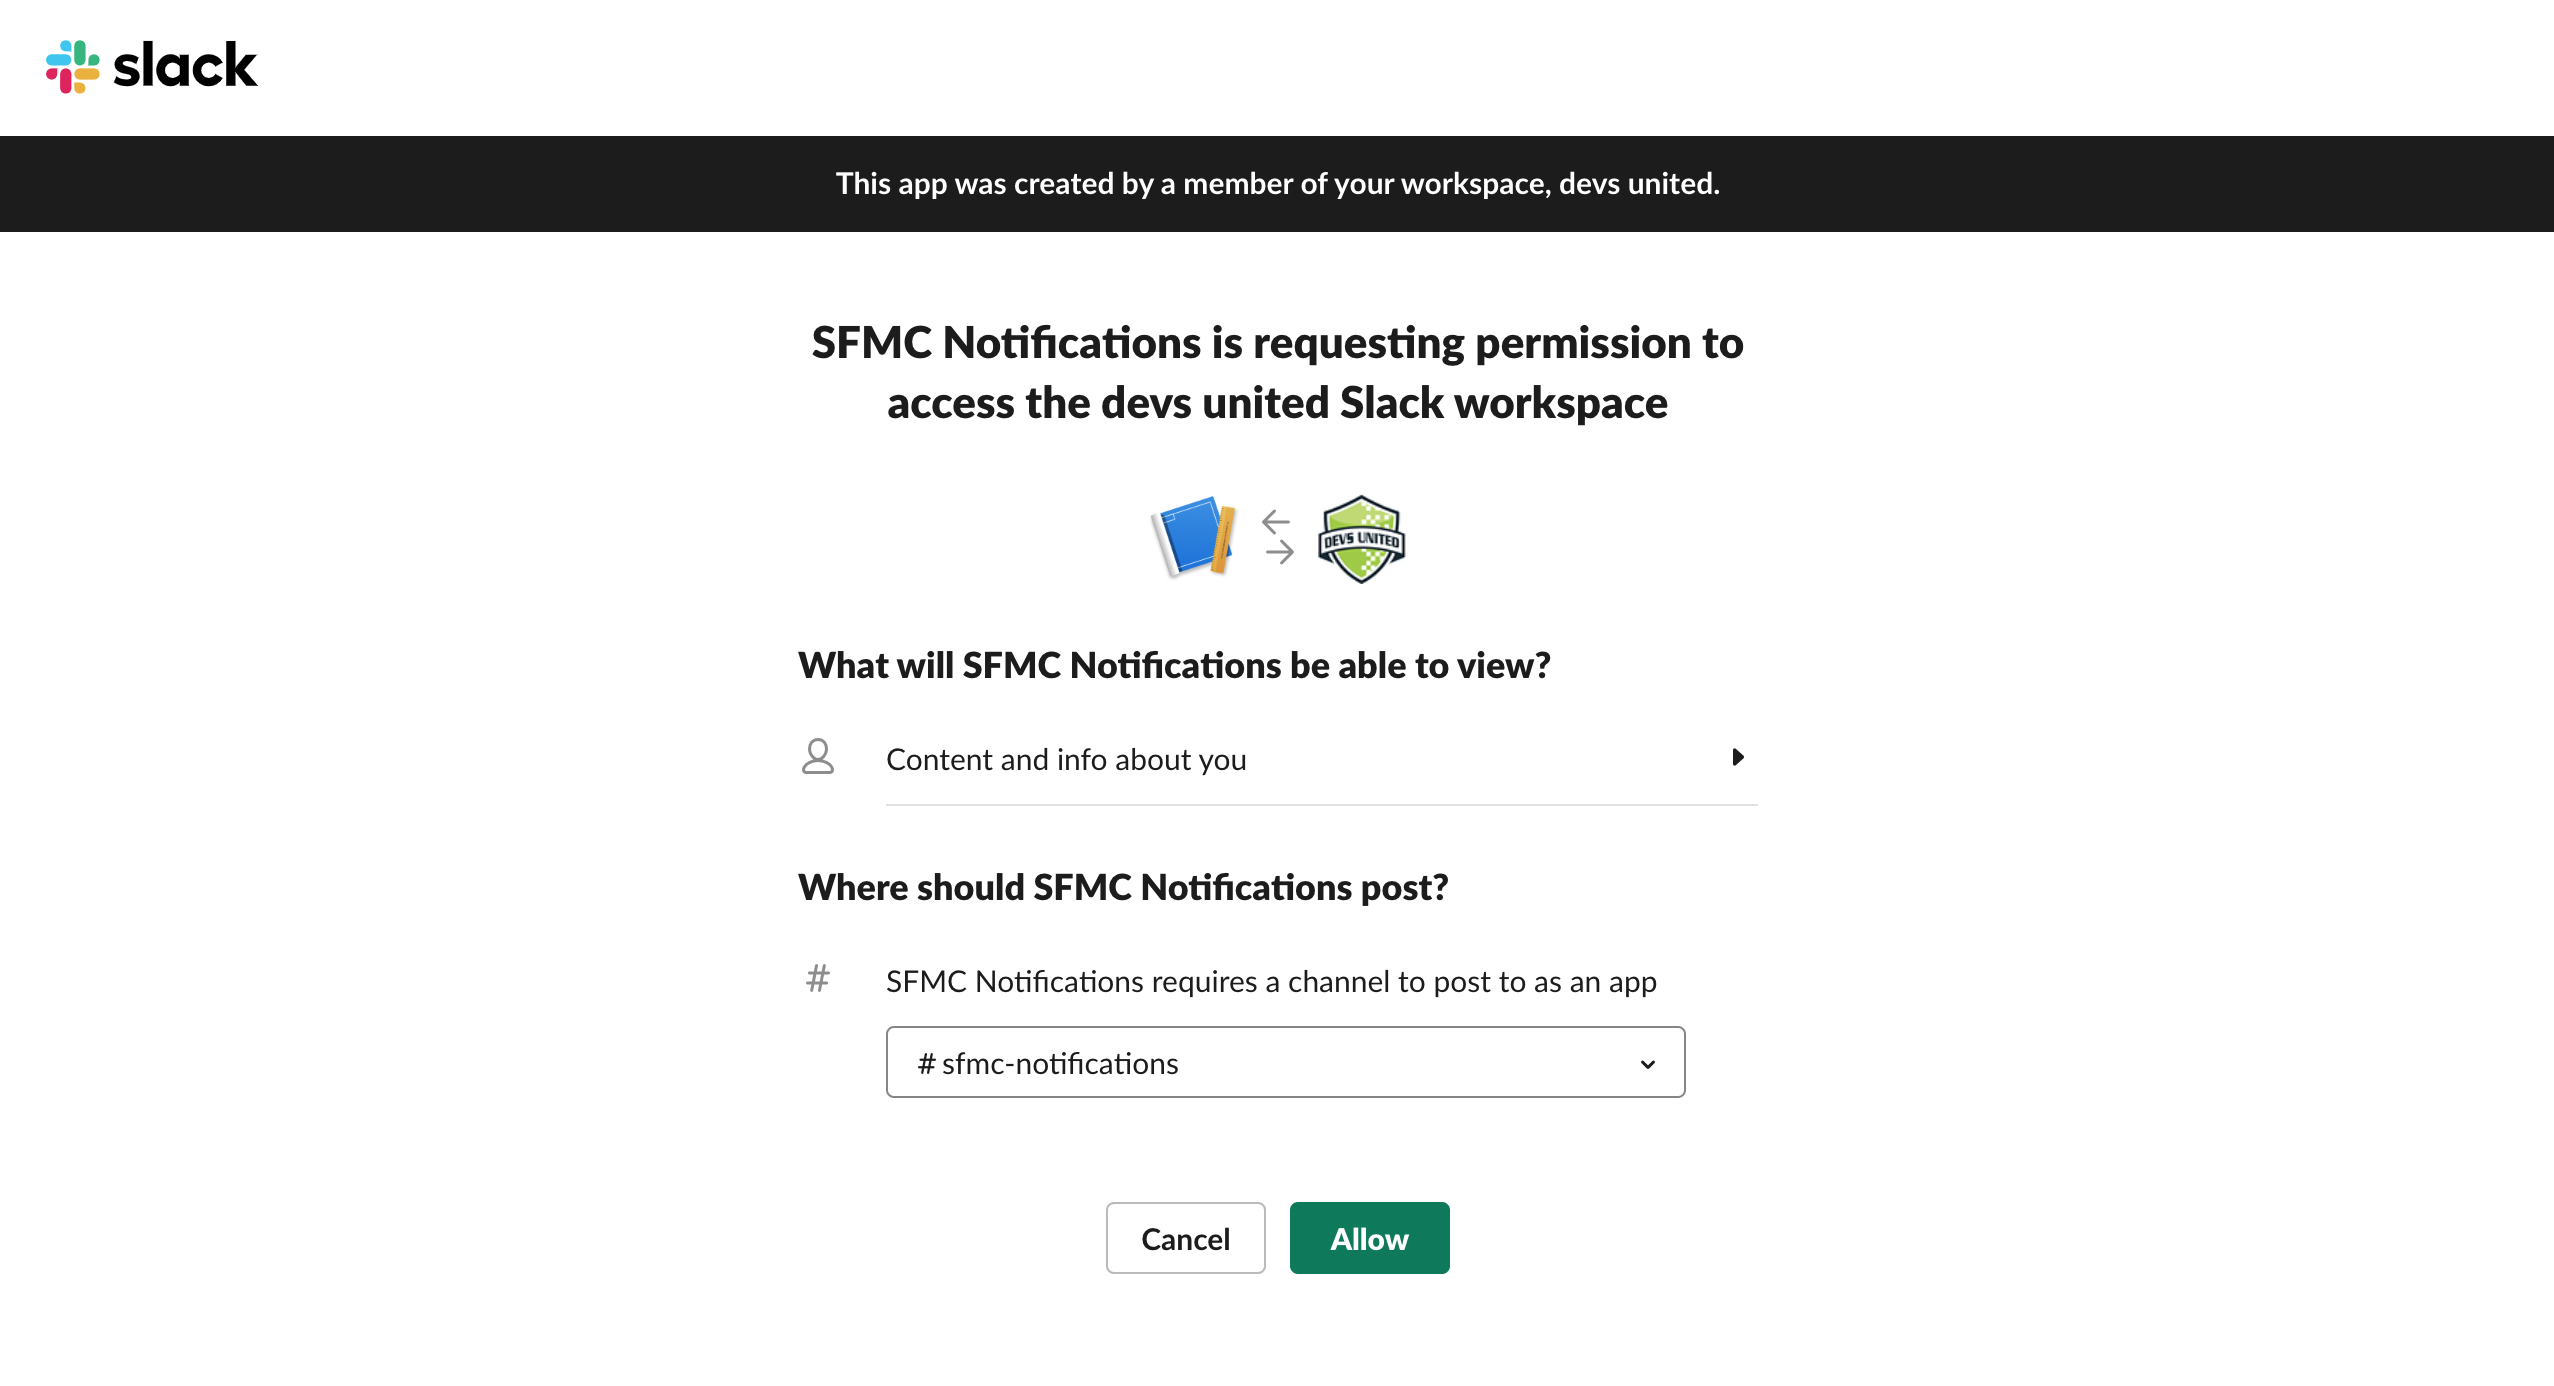
Fig 3. Authorizing our newly created Incoming Webhook
Once you click “Allow”, you will be redirected to your apps settings, were you should be able to see a new entry under “Webhook URLs”. Copy this URL because you will need it soon!
Step 3. Create the Script in Google
In order to automate the task of checking your centralized inbox and send notifications to Slack, we will use Google Apps Script. Apps Script is an awesome resource to automate tasks within your Google Drive account. We won’t get into much detail about Google Apps Scripts, but you if you are interested, you can read more about it here: https://www.google.com/script/start/.
Access the GSuite Developer Hub by going to https://script.google.com/home. Then, create a new project, name it something you will identify later, like “SF Notifications”.
Copy the Apps Script code found here: https://gist.github.com/psapir/732b8175b50673b8cc55a81dc0c70f14 and paste it to your Script editor window. Replace the text saying [YOUR SLACK WEBHOOK URL] with the URL you copied on Step 2.
You can also replace the options for the notification, like the username that’s sending the notification, colors, and other options that you can explore here: https://api.slack.com/messaging/webhooks
What the code does: uses the GmailApp class to access the inbox associated with the Google Drive account and searches for messages matching the Subject Line containing the Verification Code. Once we find the messages, we send them to Slack and then delete them so the next time our script runs we won’t find these same codes again.
Step 4. Test the Process
Select the “Run Menu” then “Run function – SFNotifications” to test your process. Make sure you have emails in your inbox for verification codes sent no later than 1 day. When you do this for the first time, you might need to authorize Google to have access to your email inbox.
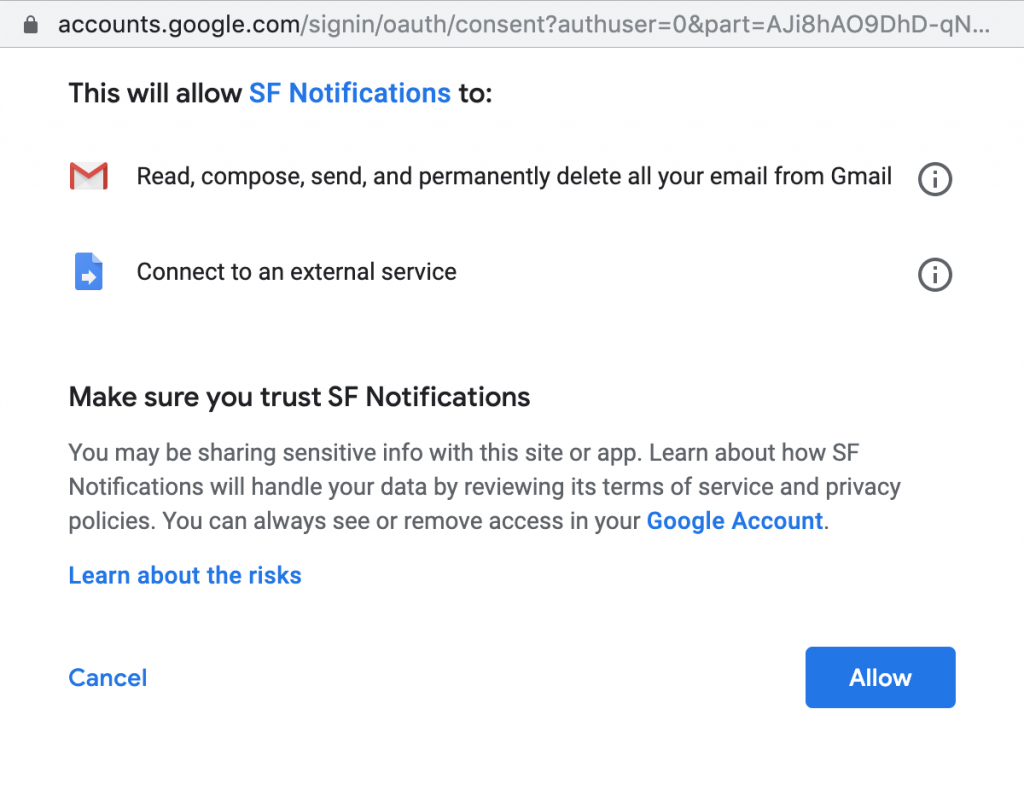
Fig 4. Authorizing your code to access your inbox.
If everything works as expected you will get notifications on Slack like the one below:

Fig 5. Verification codes on Slack!
Step 5. Schedule the Process to Run Every Minute
The final step is to tell Google that you want to run this process every minute.
Go back to the GSuite Developer Hub home page, click on the 3 dots next to your project’s name and select Triggers:
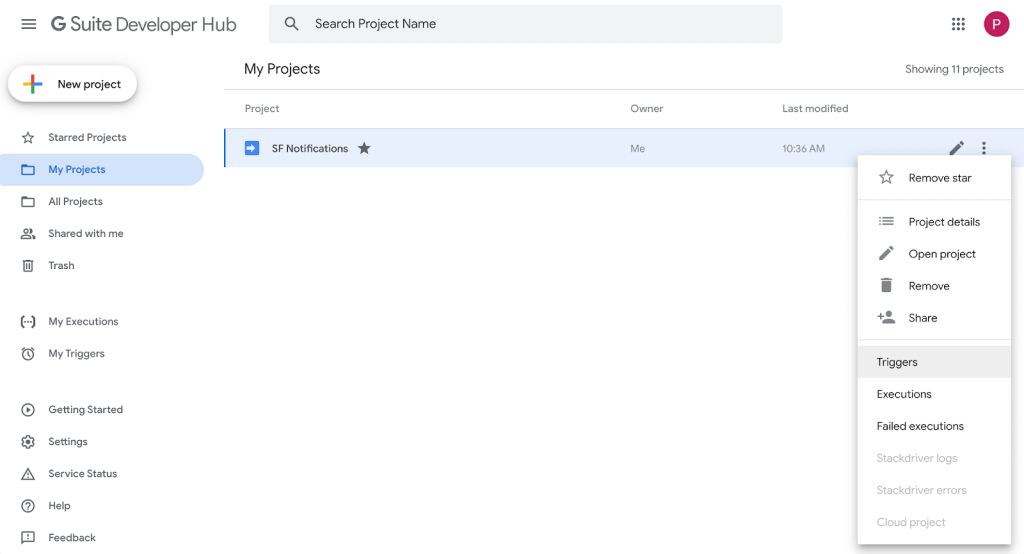
Fig 6. Selecting the Triggers for your project.
On the bottom right, click on the “Add Trigger” button and complete the popup with the following options shown below:
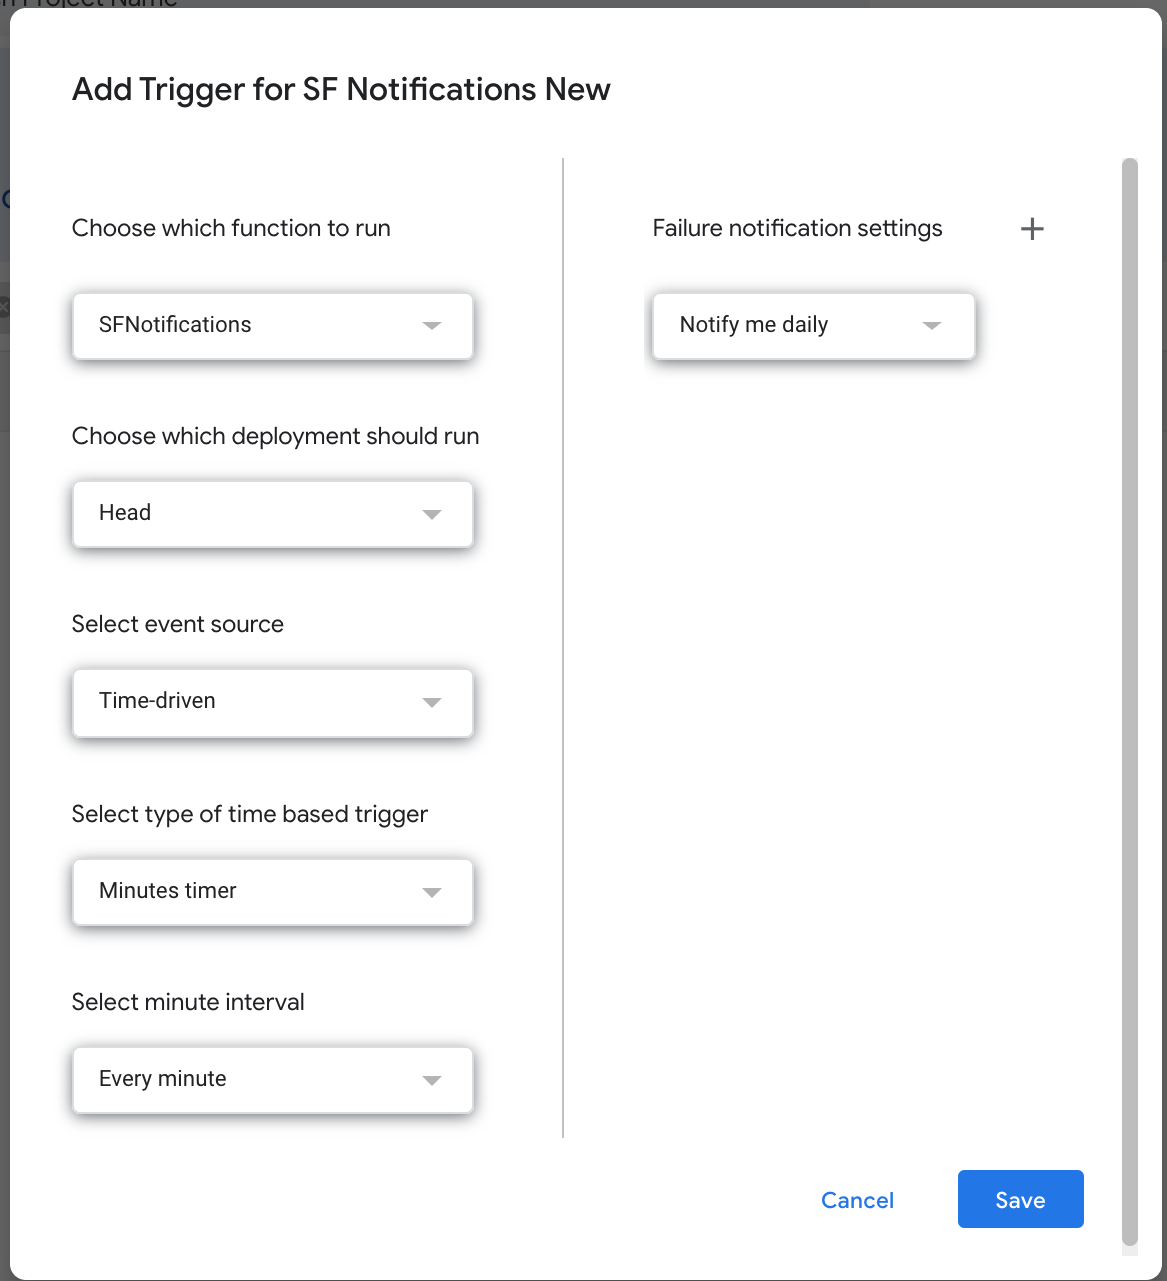
Fig 7. Configuring your Trigger to run every minute.
Click “Save” and you are all set!
Conclusion
While the best option to keep your environment secure is to create one user account per person, this method ensures that activation codes are sent securely to a Slack channel that you can control easily.
